


Newborn Photography Posing Table 2.0
Quick Start and Safety Guide
⚠️ CAUTION: Carefully read these instructions and watch all the videos for safe operation.
DO NOT USE if this product should become damaged and/or components are broken. Check this product for damaged hardware, loose joints, loose bolts or other fasteners, missing parts or sharp edges before starting each session.
What's in the box:
- Newly Redesigned Metallic Posing Table 2.0
- Mattress with removable donut hole and adjustable backdrop
- 2x side pockets
- 4x lockable silicone swivel casters
- 4x plastic foot caps
Included Enhancements for this Version 2.0:
- 2x Tiltable lateral arches
- If you buy during the PRE-ORDER period, we will include the Flat-Lay Positioning Kit for FREE (a $69 value) an add-on that allows you to convert your posing table into a low-profile, stable platform, perfect for capturing those beautiful overhead shots with minimal effort.

The assembly process for the Posing Table frame is remarkably straightforward. To set up the table, begin by unfolding the table legs in the usual manner. Take care to ensure that each leg is positioned in a straight orientation, and that all four safety steel hinges located in the corners are fully extended and locked. These four corner hinges comprise one of two locking mechanisms which serve to secure the table in the open position.
The second mechanism is an horizontal pole that is equipped with an auto-locking pin. This component functions to secure the table in place as the legs are fully extended. Once the horizontal pole is locked into position, the Posing Table frame will be securely fixed and ready to use.
USEFUL TIP: The initial step of unfolding and securing the table legs can be effortlessly achieved by positioning the table either on its side or in a completely inverted orientation (upside down).


▶️ Please ensure that all four safety steel hinges located in the corners are fully extended and securely locked by applying pressure. This step is essential for proper usage and to ensure the safety of the equipment.
▶️ Once all corner hinges have been firmly secured, proceed to lock the horizontal pole using the locking pin. It may be necessary to over-extend the outer and inner poles in opposing directions until a distinct clicking sound is heard. Please note that this step is of utmost importance for ensuring safety.
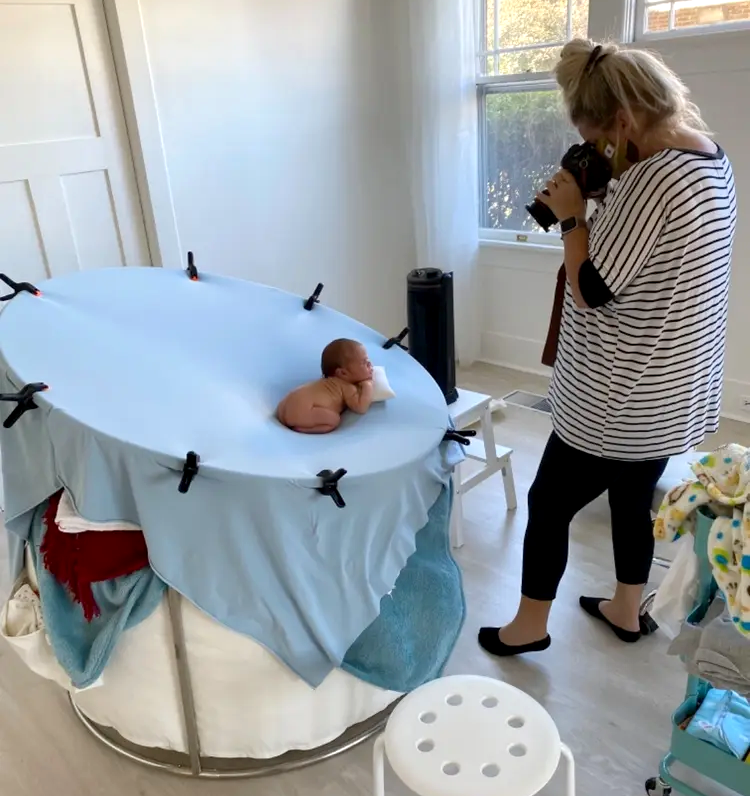
Open the backdrop holder tilt arch. Our redesigned Posing Table uses an innovative tube clamp system for easier positioning of the backdrop and lateral tilt arches at any angle. This allows you to select the desired angle of inclination to clamp your desired backdrop fabric. With just simple manual adjustments, you can achieve the optimal angle for your backdrop and capture the perfect shot effortlessly.
Place the mattress onto the frame and securely fasten it in place using the included velcro straps. Next, place the backdrop protection on top of the backdrop holder tilt arch and firmly secure it in place using the included velcro strips. Following these steps will ensure a stable and safe setup for your equipment.


To optimize your working experience and keep your accessories within reach, you may utilize the side pockets provided. These pockets can be easily secured to the table legs and horizontal bar via velcro straps. Simply affix the pockets in your desired location and enjoy the convenience of having your items nearby during your session.
To maximize leg room for seated photography and facilitate side pocket attachment, it is necessary that the horizontal safety pole be smoothly slid towards the rear end of the posing table. This position will allow ample space for the photographer's legs and permit the pole to be aligned with the designated opening for effortless installation of side pockets.

Flat-Lay Positioning Kit Installation Guide
An essential add-on that transforms your newborn photography sessions by making it incredibly easy to achieve stunning flat-lay portraits. This innovative kit allows you to convert your posing table into a low-profile, stable platform, perfect for capturing those beautiful overhead shots with minimal effort. By simply attaching the kit’s additional parts, you can seamlessly transition to a flat-lay setup, ensuring that your top-view portraits are consistently flawless. The Flat-Lay Positioning Kit not only enhances the versatility of your posing table but also saves you valuable time, allowing you to focus on creating perfect images that your clients will love.